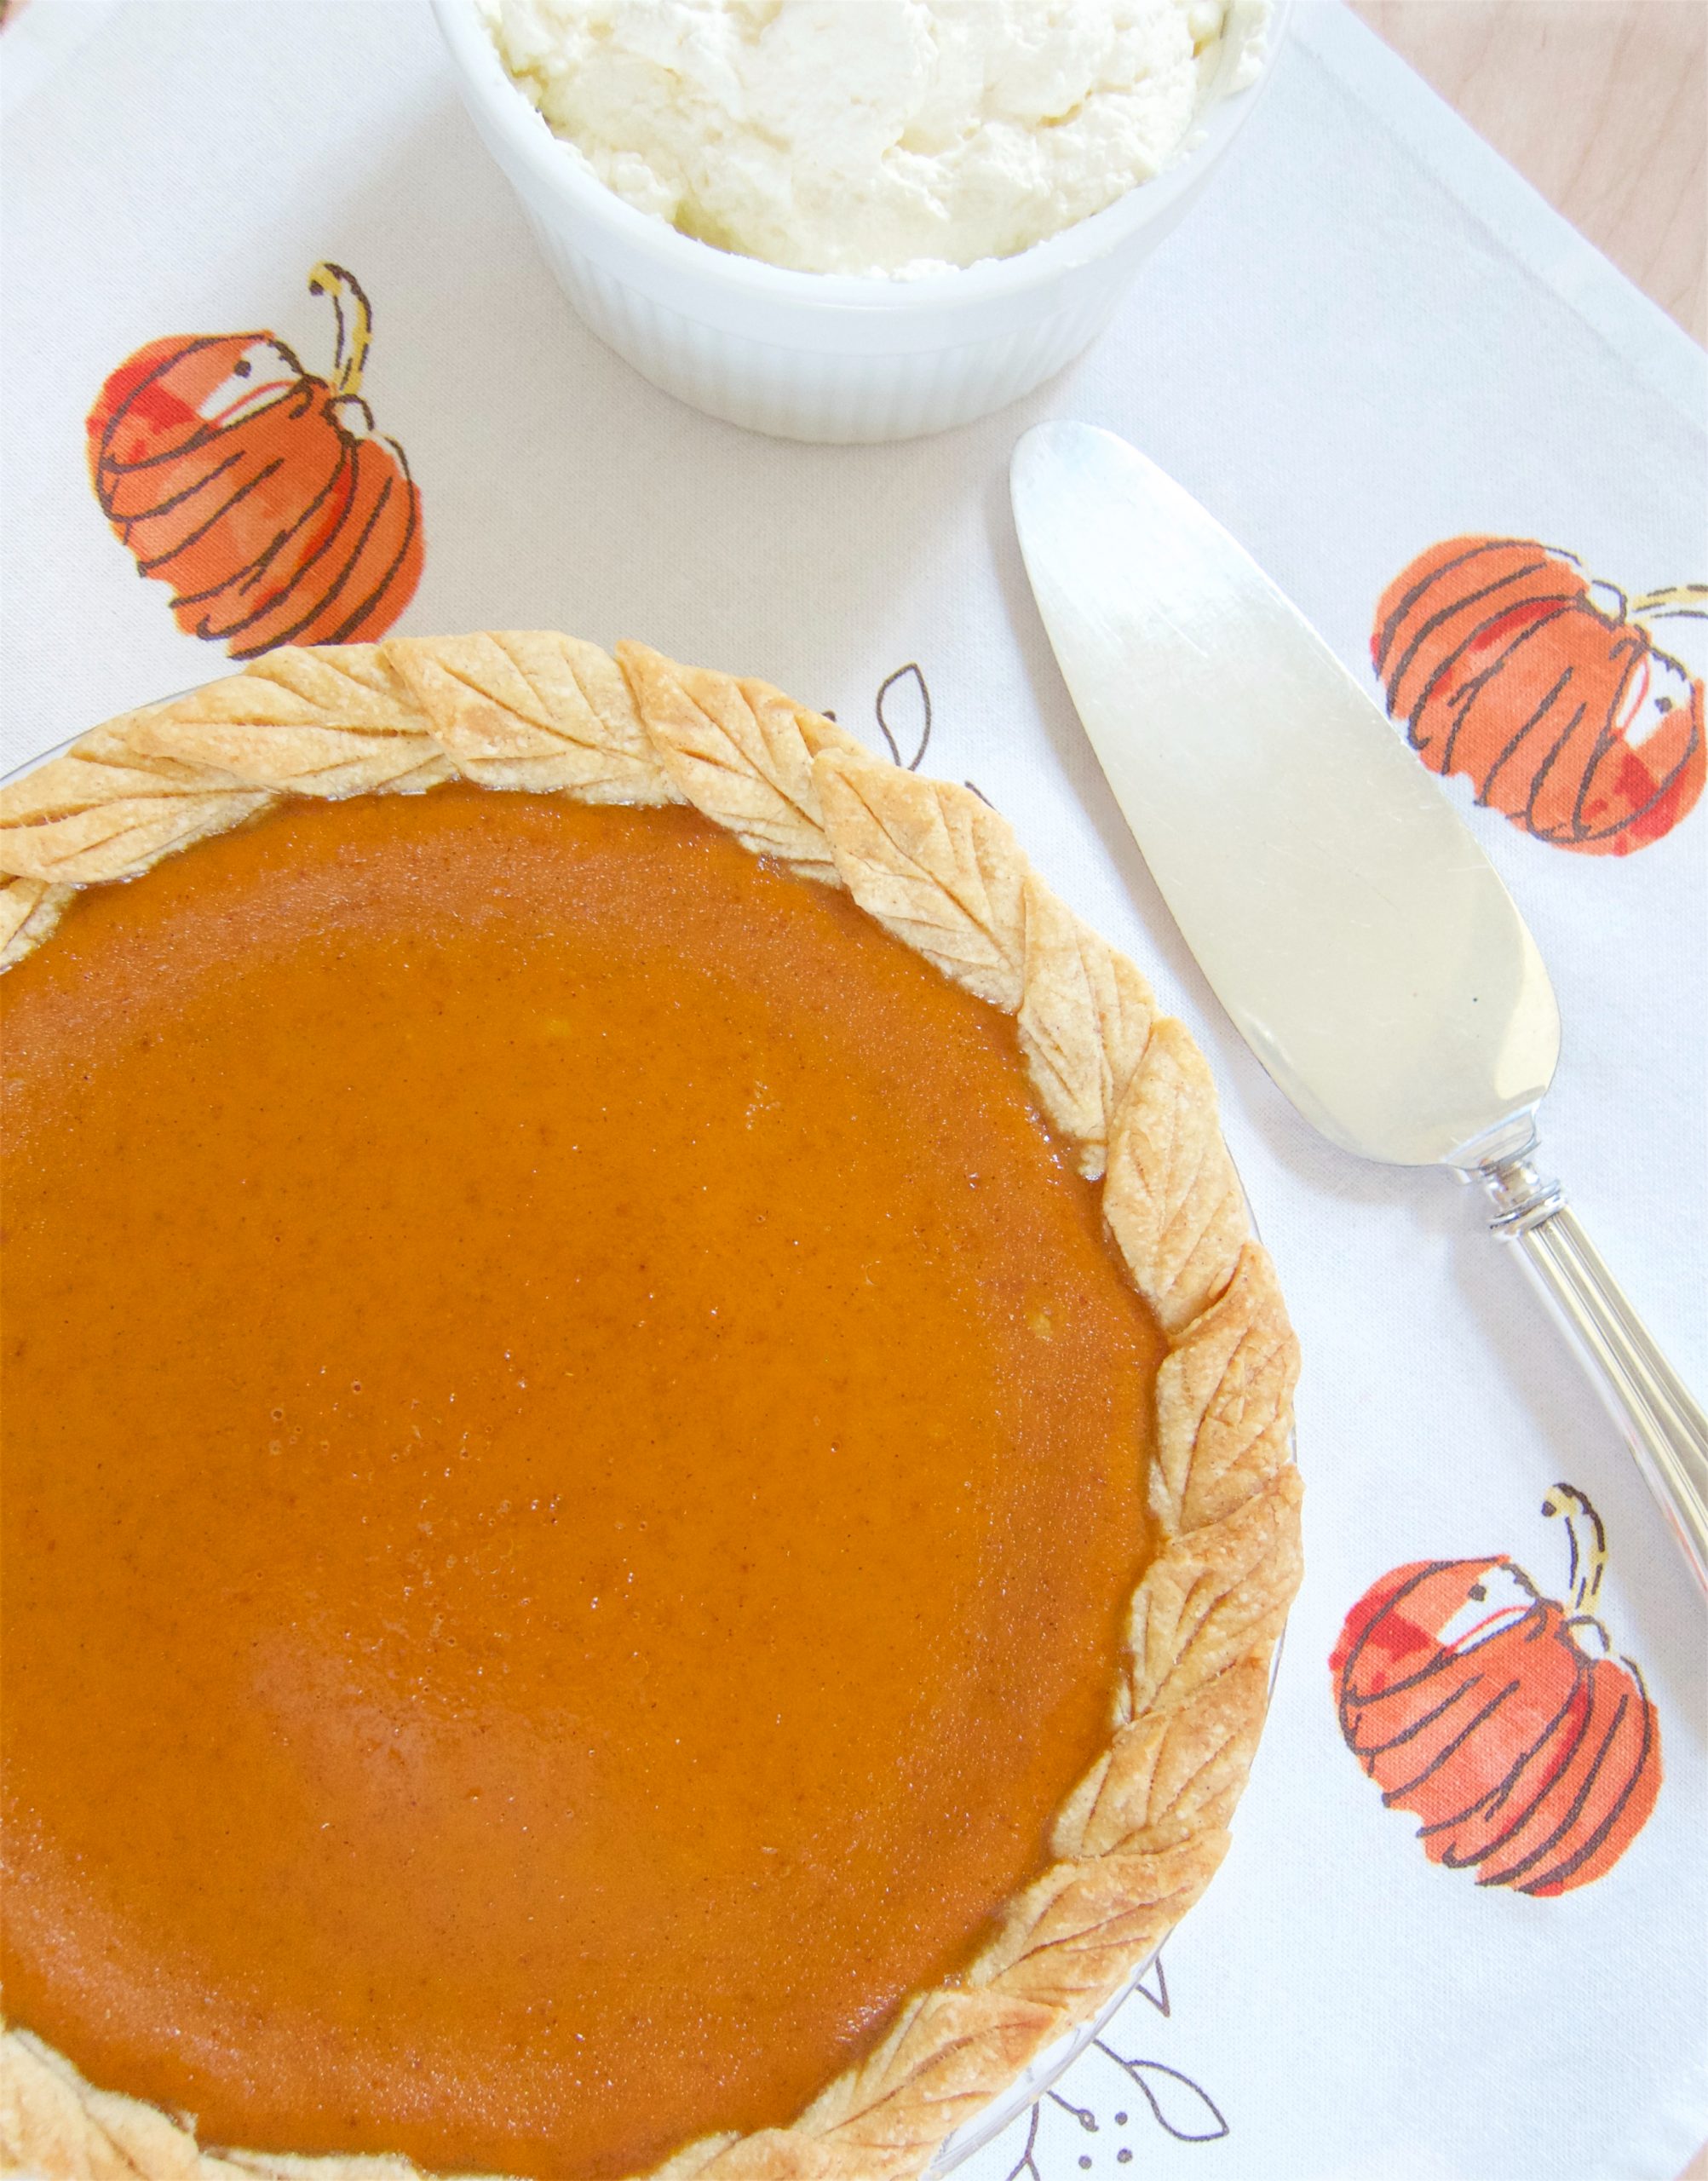
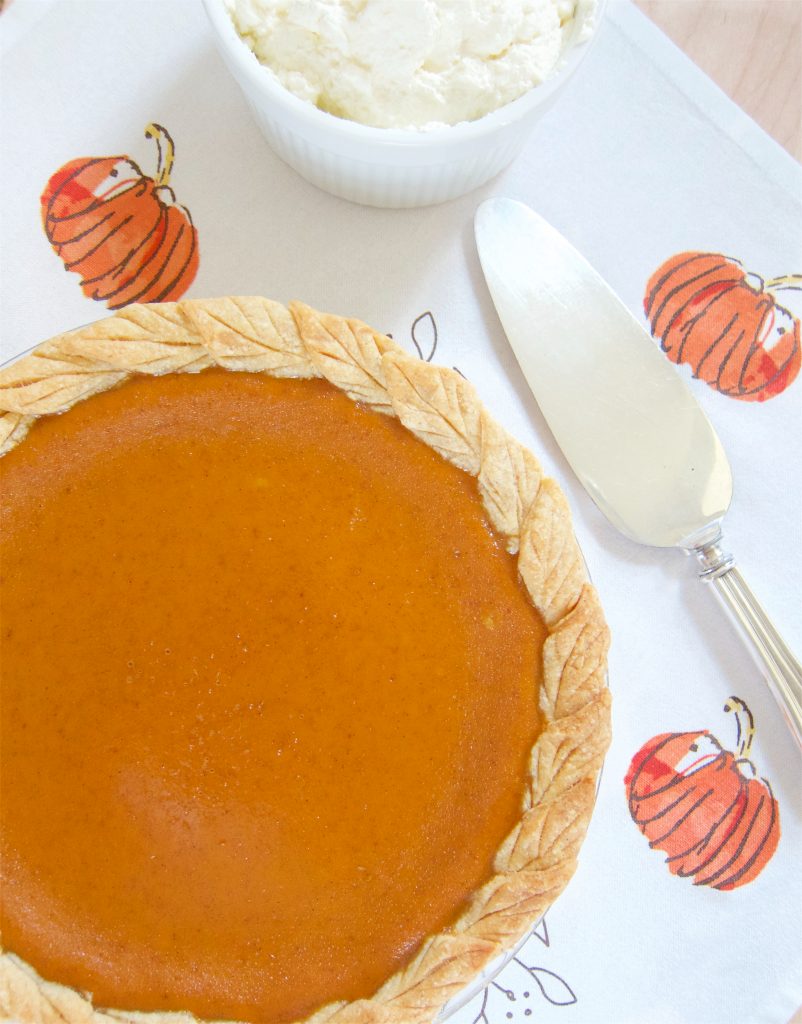
Pumpkin Pie With Maple Syrup
The other day my mother was thinking about her childhood and said that she thought her parents were pioneers. She was born while they lived in a logging camp where her dad had been hired by the logging company to be their doctor. My grandmother was his nurse and they were saving up the ten thousand dollars they needed to make their way to the city and open a medical practice in Beverly Hills (my times have changed!). My mom was born in that logging camp because there was a snow storm when my grandmother went into labor and they couldn’t get to the hospital.
When I think about how I used to live on a farm and I would go out to the garden on Saturdays and pick out a couple pumpkins from the pumpkin patch to make pies, I get a glimpse of how my mother feels. It’s different in the city. The pioneering ends when you move to the city and your brain gets rewired to think of everything coming in a can. But it’s okay. It’s a lot less work and the pies still taste wonderful! Don’t use canned whipping cream though. Whip it yourself.
“The first printed sweet pumpkin pie recipe appears in 1796 in the cookbook American Cookery, and is similar to the modern pies enjoyed today:
One quart stewed and strained pumpkin, 3 pints cream, 9 beaten eggs, sugar, mace, nutmeg, ginger, laid into paste No. 7 or 3, and with a dough spur, cross and cheque it, and baked in dishes 3 quarters of an hour.”
wheatsfield.coop
Pumpkin Pie With Maple Syrup
Pâte Sablée (rich pie crust with sugar)
(for a standard 9″ pie plate)
Ingredients
- 7 ounces (about 1 1/2 cups) flour
- 2 tablespoons powdered sugar
- 1 stick cold butter, cut in to 8 pieces
- 1 large egg yolk
- 4 tablespoons cold water
Instructions
Note: If you weigh the flour, you will use the full 4 tablespoons of water and save yourself the trouble of having to think about whether or not you have the right amount of flour to water ratio. If you measure the flour you will need to add 2 tablespoons of water and then 1 tablespoon at a time add more as needed to get the right consistency. It should look crumbly (not smooth) and be moist (the ‘crumbs’ stuck together). If there is too little flour or too much water, the dough will be gummy. If the dough is very stiff, you have too much flour or too little water.
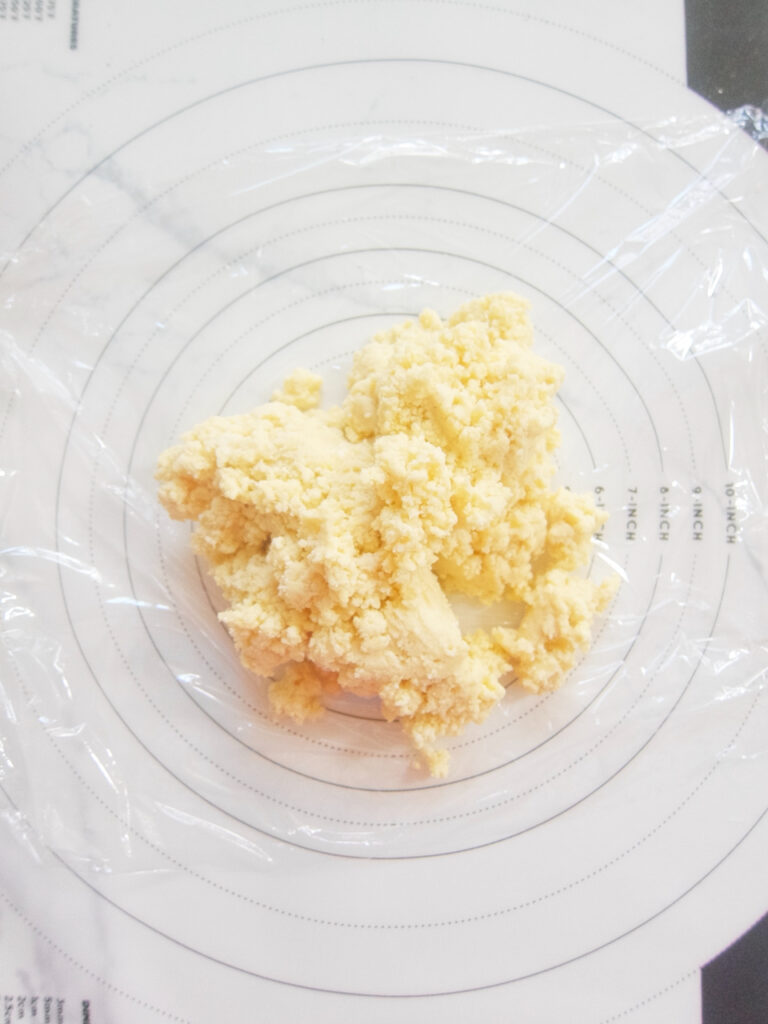
You can mix the crust by hand, placing the flour and sugar in a large heavy bowl, cutting the cold butter into 8 pieces dropping them over the flour mixture, then pressing the pieces of butter with the flour mixture together until there are only crumbs are about the size of oats, then make a well and pour in the egg beaten with the water. Or you can use a food processor but you need to be careful that you don’t over process the flour and build up its gluten making the crust tough. Place flour, sugar, pieces of butter and egg yolk in a food processor and pulse a few times until the butter is small crumbs about the size of oats. Add the egg yolk and turn the processor on and quickly add the water and turn the processor off just before the dough forms a ball. This takes just seconds.
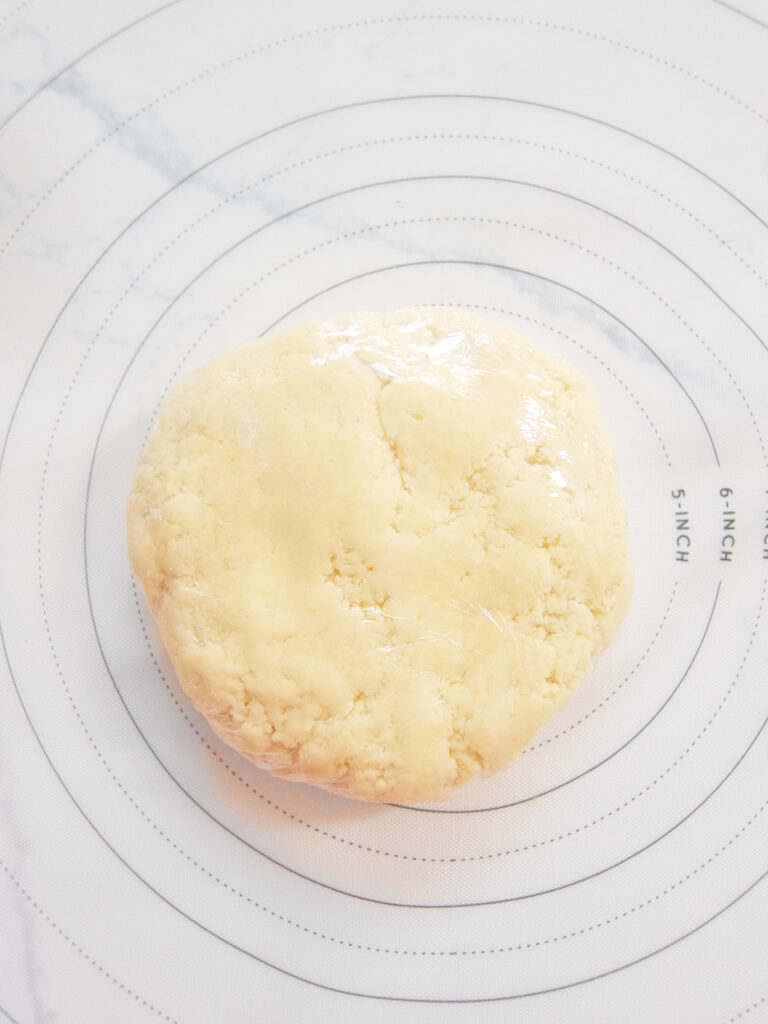
Pour the dough out on to a piece of plastic wrap. Mold it into a 6″ disk, wrap and chill in the refrigerator for 1 hour.
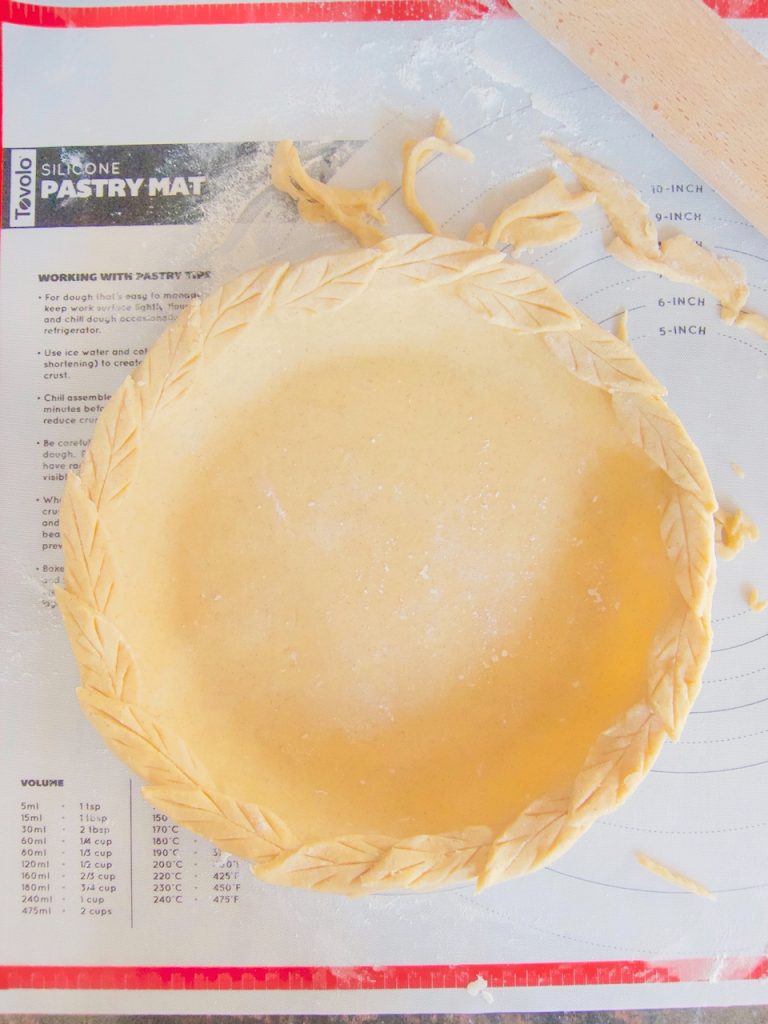
Roll out on a lightly floured surface to halfway between 1/8″ and 1/4″ in thickness and place into a 9″ pie plate molding it to the sides without stretching the dough so it won’t shrink when it’s baked. Trim 1/2 inch from the edge of the pie plate, fold the pastry under to make a thicker edge, then flute the edges.
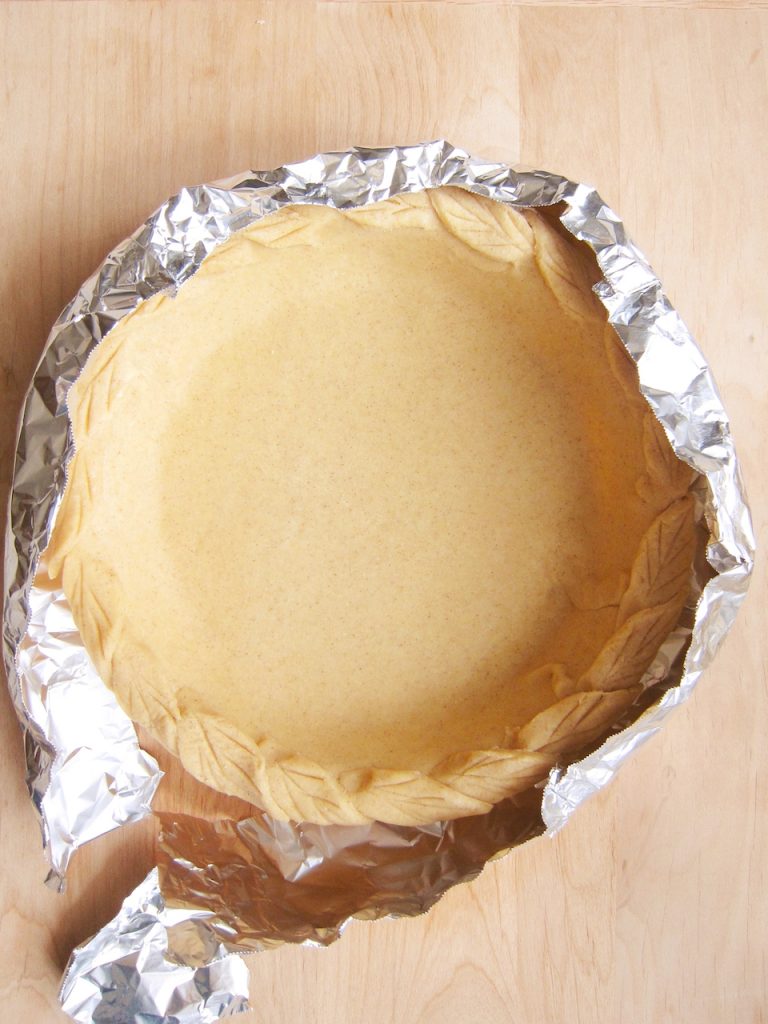
Note: To keep the crust from getting too brown, make a foil collar and wrap it around the edges. Doing it this way works better than the store-bought pie protectors. To make a collar, you will need 4 3″ pieces of foil. Attach them together in to a long strip by folding the ends together. Then shape the strip in a C shape to enclose the crust. Wrap the collar around the crust, fold the two ends (you may have to tear off 3 inches to make it the right size) and mold into place. If you normally brush milk on your crust, don’t as the wet crust can stick to the foil.
Note: To avoid the crust shrinking, one option is to freeze the pie crust for 30 minutes. Another is to blind bake it. Prick the bottom of the crust with a fork about 15 times, line the crust with parchment paper and fill it 2/3’s with dried beans. Bake for 15 minutes in a 375° oven. Then remove the parchment and beans and add the filling and continue with the recipe.
MasterClass.com
Filling
Ingredients
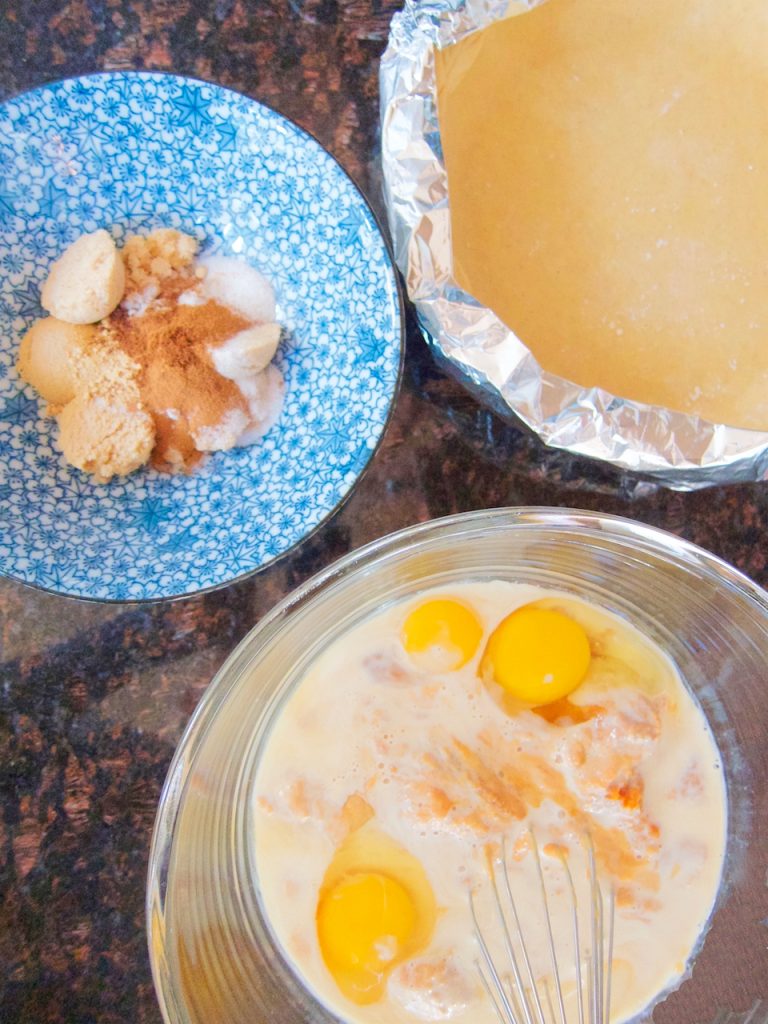
- 6 tablespoons light brown sugar (you can use coconut sugar in place of the brown and white sugars)
- 2 tablespoons white sugar
- 1 teaspoon cinnamon
- 1/2 teaspoon ginger
- 1/8 teaspoon cloves
- 1/2 cup Trader Joe’s maple syrup (or dark corn syrup)
- 3 eggs
- 1 cup solid-packed (not watery) pumpkin, like Wegman’s and Libby’s 100% Pure Pumpkin
- 1 cup evaporated milk, 1 cup heavy whipping cream, or canned coconut milk*
- 1 teaspoon vanilla
Instructions
Place all the dry ingredients in one bowl and mix together. Place the wet ingredients in a second bowl and whisk until well blended. Pour the dry ingredients together with the wet and mix together well. Put 1 1/2 cups of the filling in a measuring cup. Pour the remaining into the crust. Place the pie in the oven, pouring the filling in the measuring cup. (Doing this keeps the filling from spilling and messing up the crust. Bake the pie in a preheated 400 degree oven for 20 minutes, turn the heat down to 325 degrees and bake an additional 40 minutes or until center jiggles just a little. You can test for this by shaking the oven rack. Cool on a cookie rack.
Serve chilled or at room temperature with whipped cream.
Whipped Cream
Ingredients
- 1 cup heavy whipping cream
- 1/4 cup powdered sugar
- 1/2 teaspoon vanilla
Instructions
Pour the cream into the mixer bowl. Whip for several minutes until peaks are starting to form. Add the sugar and vanilla and continue beating until the cream changes from very soft looking to stiff, before it starts to become butter. At this perfect point the whipping cream will have a very buttery taste and it will hold for more than a day before it starts to separate.
*The texture will be different using coconut milk instead of evaporated milk. But if you have a problem with dairy, you won’t mind.
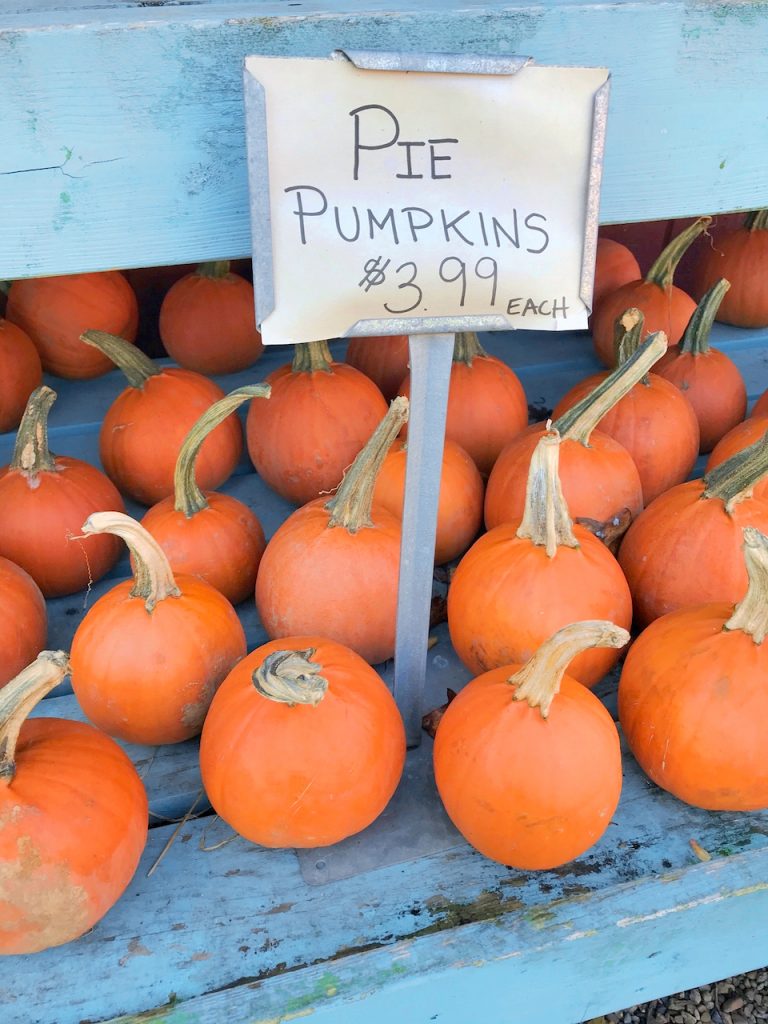
If you want to start with a fresh pumpkin, it is recommended to use Small Sugar, Pik-a-Pie, New England Pie and Baby Pam varieties of pumpkins for cooking.