Chicken Kiev (Chicken Kyiv) and Perfectly Roasted Asparagus
“Chicken Kiev {kee-yev´} or chicken Kyiv {kee´-yiv} is a dish made of chicken fillet pounded and rolled around cold butter, then coated with egg and bread crumbs, and either fried or baked.”
The origin of this dish is not clear. “Oral tradition in Kyiv attributes the invention of the ‘cutlet de volaille Kiev-style’ (kotłeta de-voljaj po-kyjivśky) to the restaurant of the Continental hotel in Kyiv {formerly Kiev} in the beginning of the 20th century. A luxury hotel built in 1897 in the center of Kyiv, it was run until the Nazi German invasion of the Soviet Union in 1941. The building was then mined by the retreating Red Army and exploded when the German Army occupied Kyiv in September 1941. After the war, the building was rebuilt and has since then been used by the Kyiv Conservatory. According to the memoirs of contemporaries, Chicken Kiev was the signature dish of the hotel’s restaurant.”
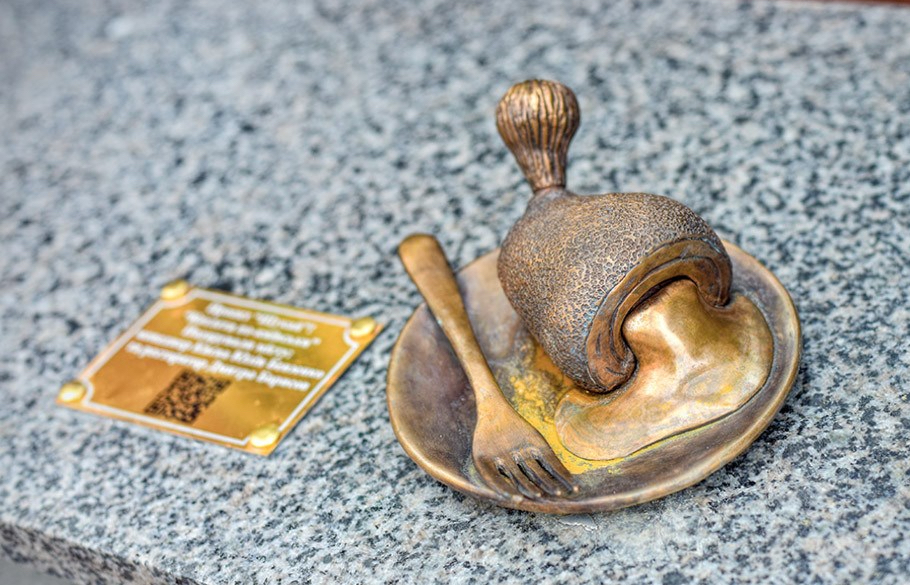
“In 2018 a bronze miniature sculpture of chicken Kiev was placed on Horodecki street in Kyiv, near the restaurant Chicken Kyiv. The sculpture became the first of a set of such mini-sculptures depicting famous symbols of Kyiv placed throughout the city as part of an art project.”
Wikipedia
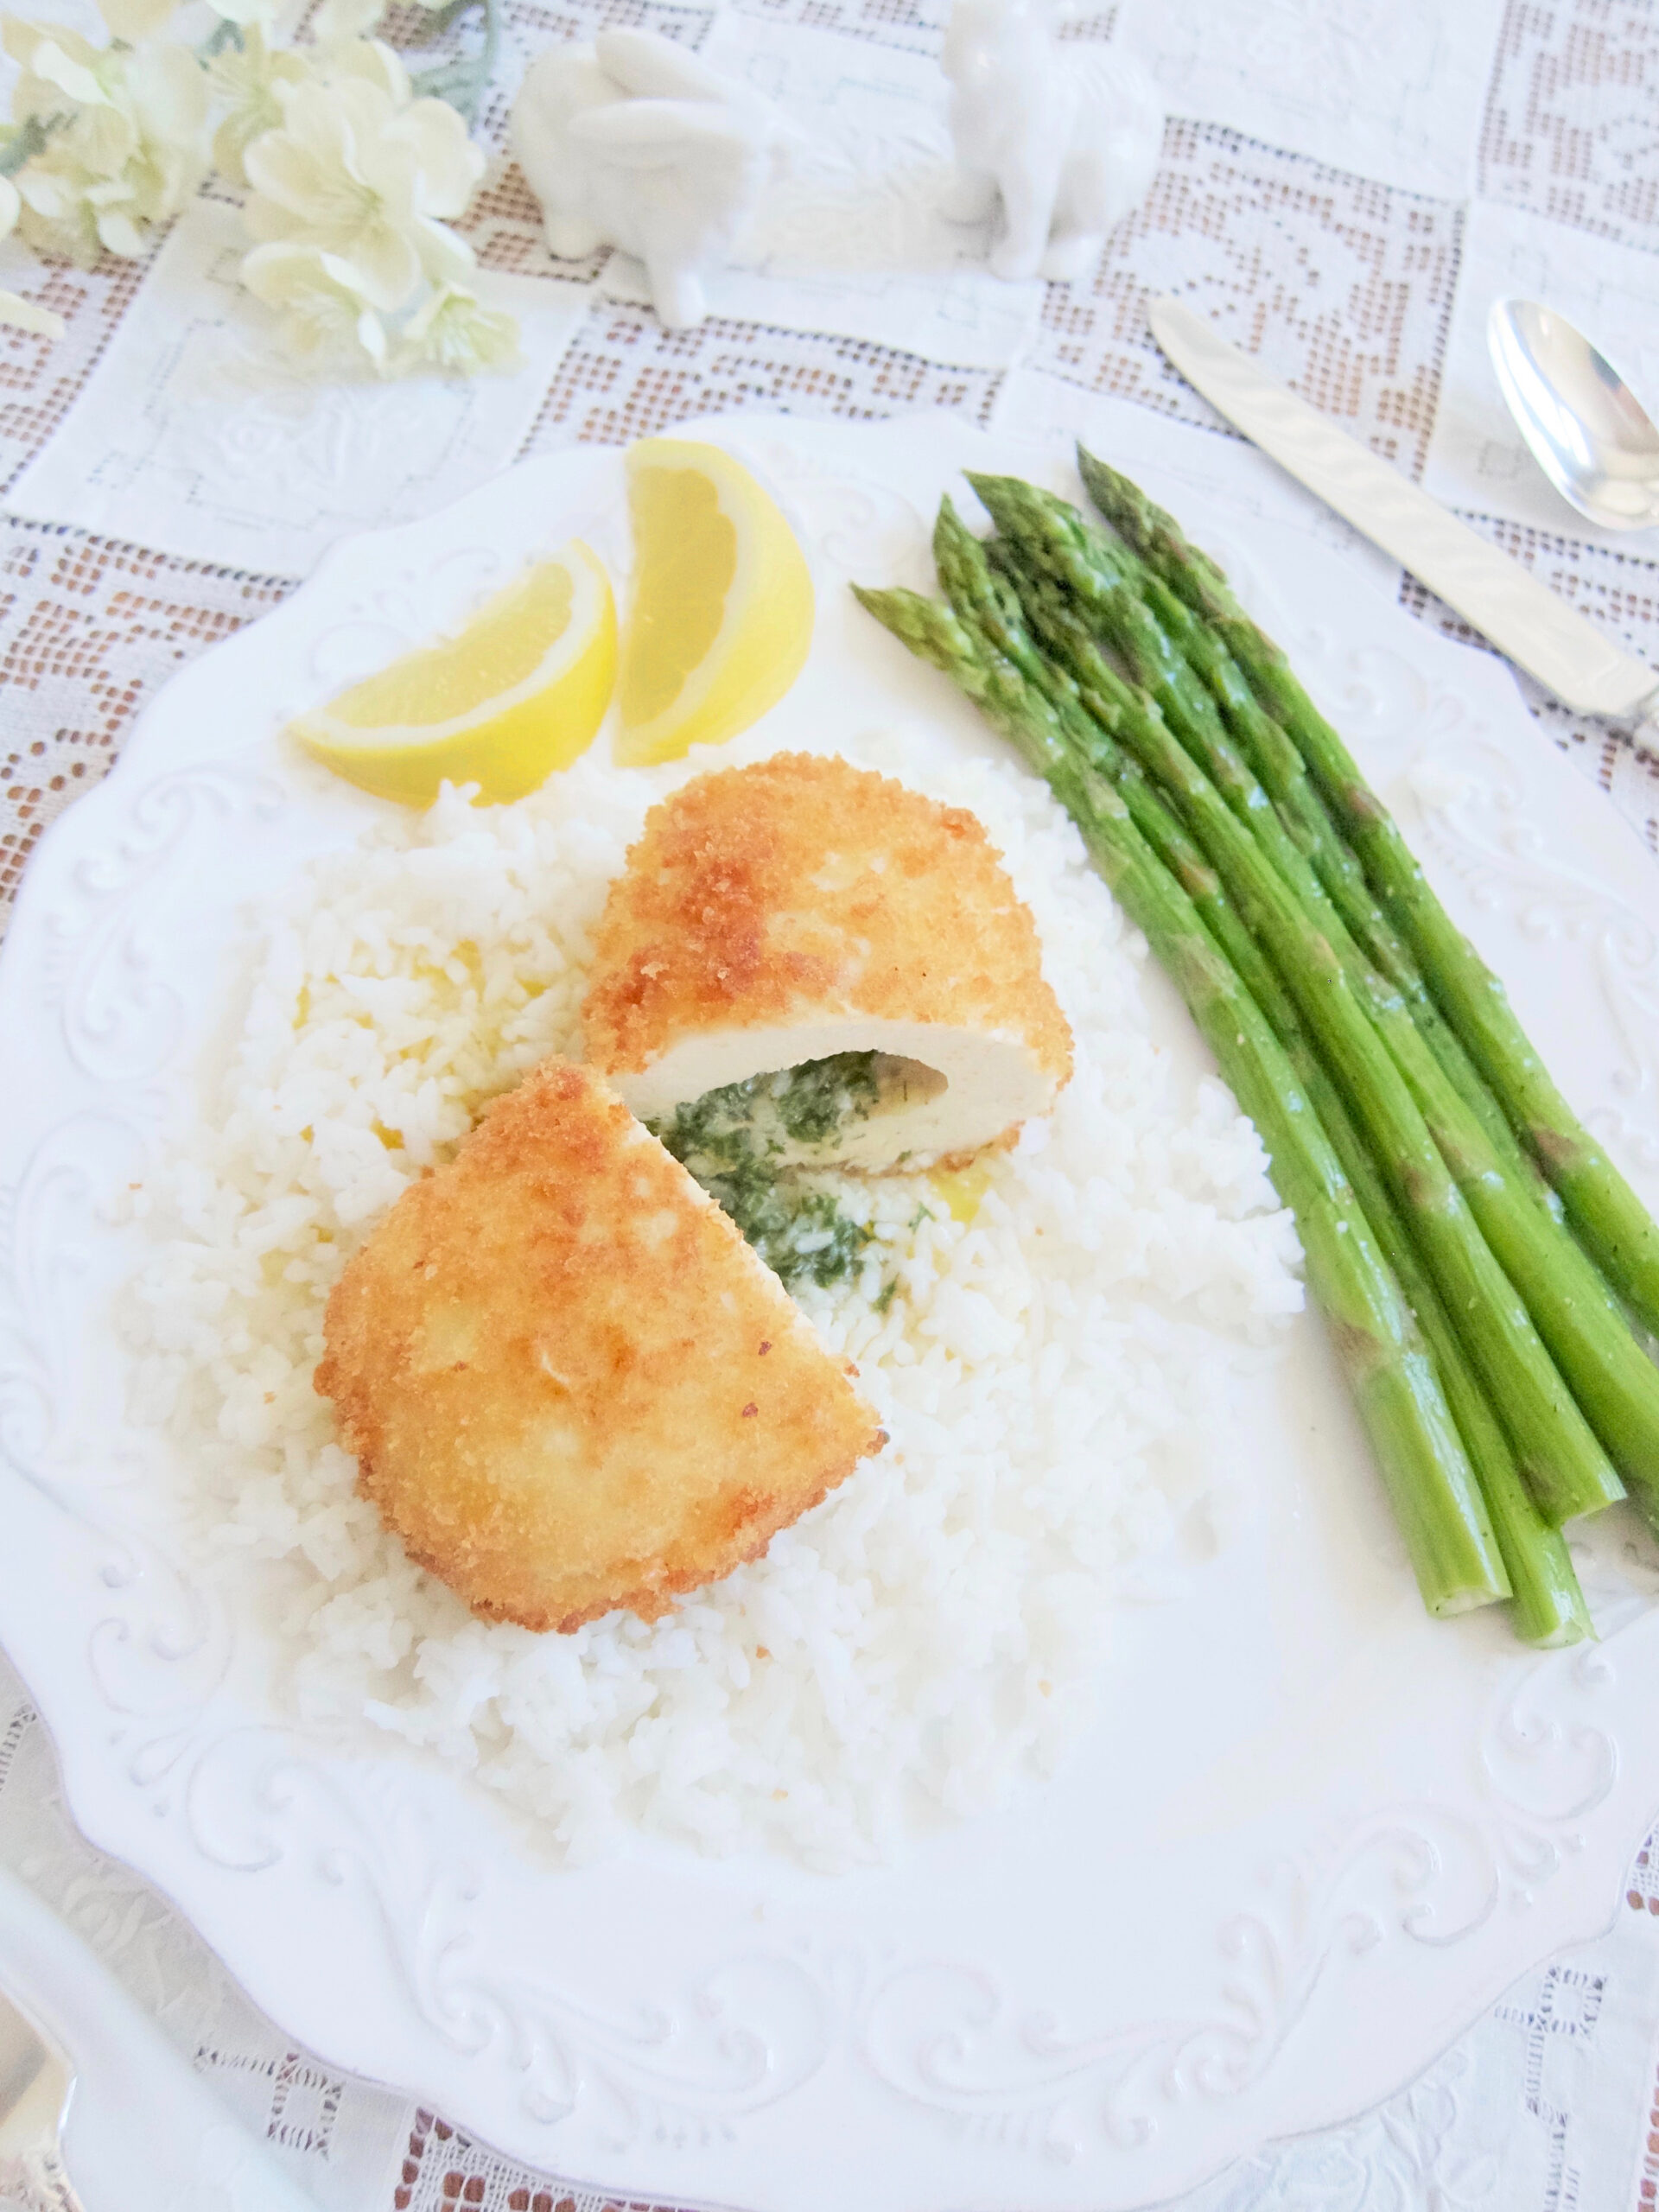
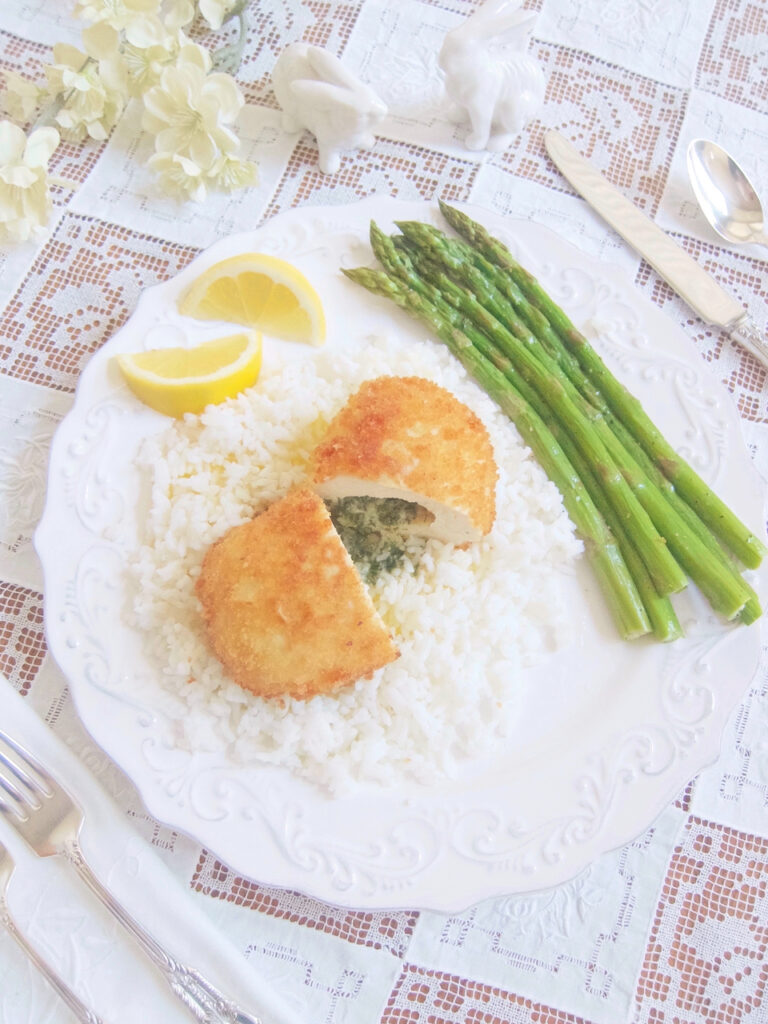
The first time I had chicken Kiev was 50 years ago at The French Poodle restaurant in Carmel, California. They placed the chicken Kiev on a bed of rice so that when you cut it open, the wonderfully flavored melted butter would be soaked up by the rice instead of being lost on the plate. It was served with a butter lettuce and sieved egg salad with their The French Poodle Vinaigrette (and we ordered a floating island for dessert).
Chicken Kiev is difficult to make. The challenge is to not have the butter leak out during the cooking process. After studying a number of videos and making a lot of mistakes, I figured out that I didn’t need to be pounding the whole breast to the 1/4″ that is often mentioned. Thinner around the edges was good for a nice seal, but it was okay for the rest to be a little thicker and not risking a split. Next was being able to make patches from the outer parts when there was a thinner area or a split, and then a freezer tip from Chef John. He has done an excellent video for chicken Kiev. He will tell you that it’s not an easy thing to make. But of course he makes it look easy. Recipetineats.com’s video is also helpful.

Chicken Kiev served over rice with Perfectly Roasted Asparagus (recipe below).
Chicken Kiev (Chicken Kyiv)
- 4 (7 – 8 ounce) chicken breasts
- 8 tablespoons unsalted Kerrygold butter, softened
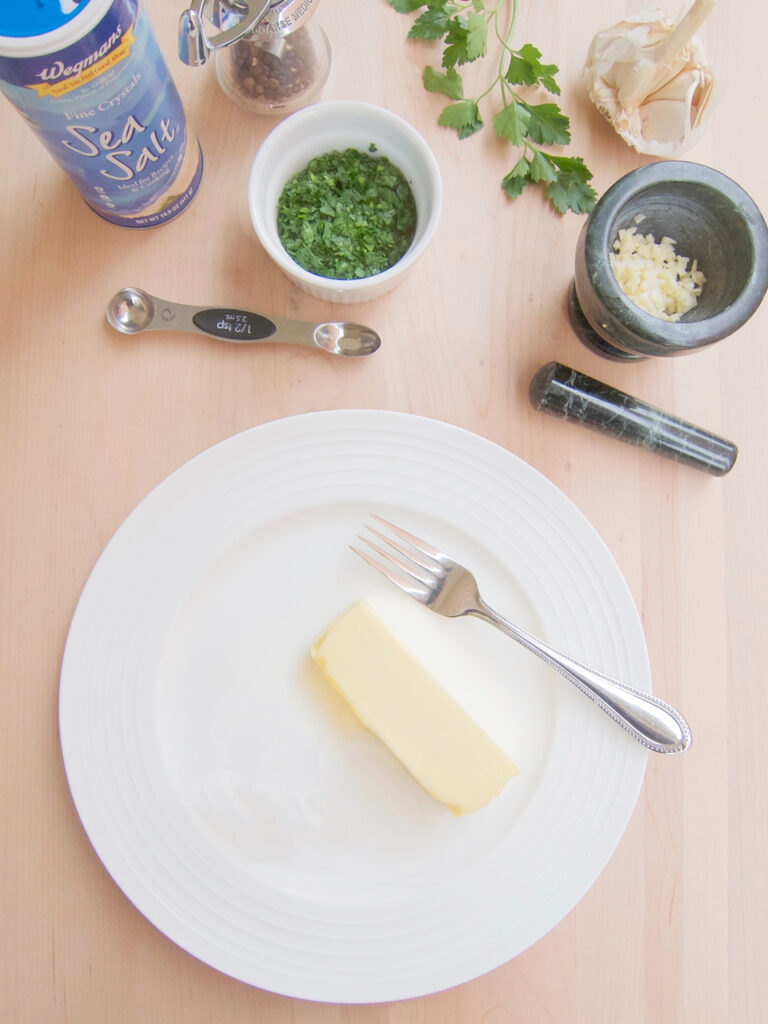
- 2 medium cloves of garlic, finely chopped, sprinkled with 1/2 teaspoon salt, then partially crushed (You can use a small bowl and the back of a spoon, or a mortar and pestle, or crush them with a large knife.)
- 1/4 teaspoon pepper
- 2 tablespoons chopped fresh Italian (flat leafed) parsley, dill or French tarragon (There are two kinds of tarragon and one tastes like grass with no anise flavor. Check the tarragon to make sure it’s the French kind that has a distinct anise flavor.)
- 3/4 cup flour mixed with 3/4 teaspoon salt
- 2 eggs, beaten
- 3 cups dry bread crumbs or panko bread crumbs
- vegetable oil for frying
Ingredients
Instructions
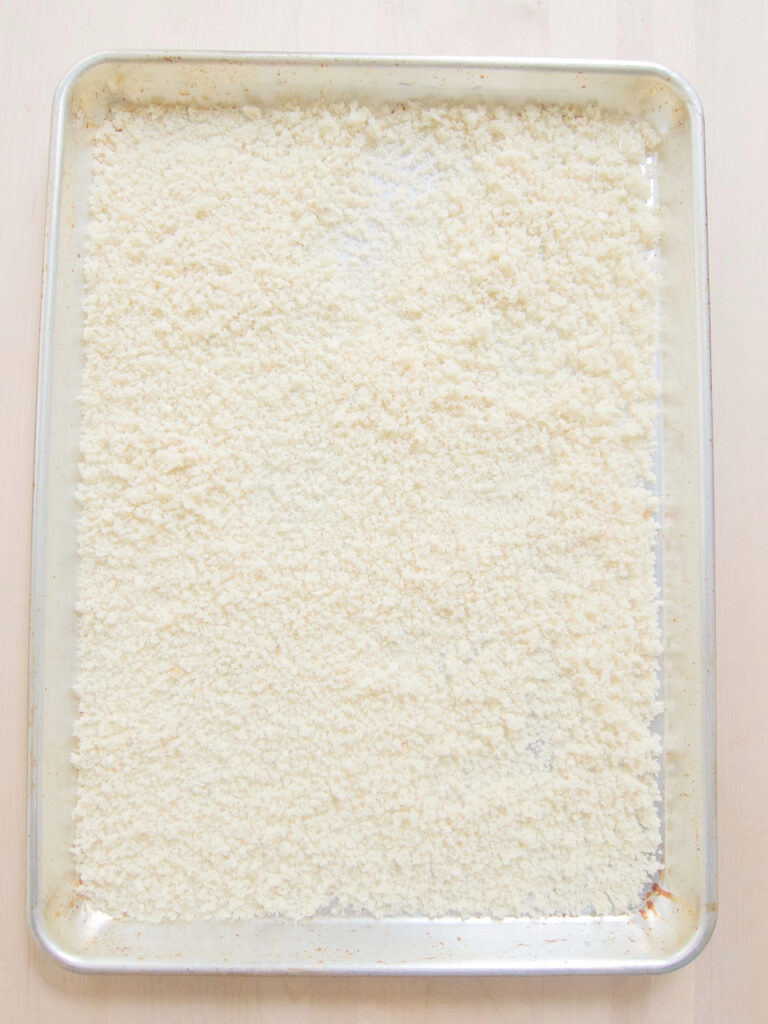
If you are making breadcrumbs, remove the crusts and break up the slices of bread into a food processor and process until they are crumbs. Dump them out onto a baking sheet and dry them out in a 350° oven for 10 to 12 minutes, stirring them half way through. They should still be white not brown. Crush them a little with a spatula so some of the crumbs are finer. Let cool.
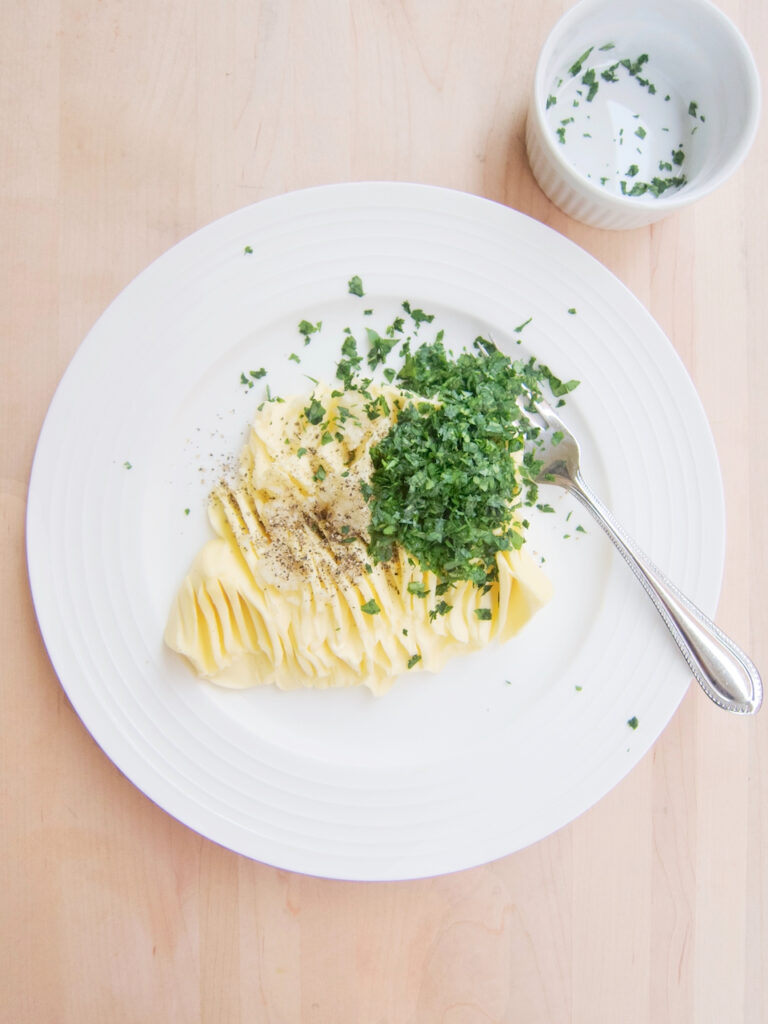
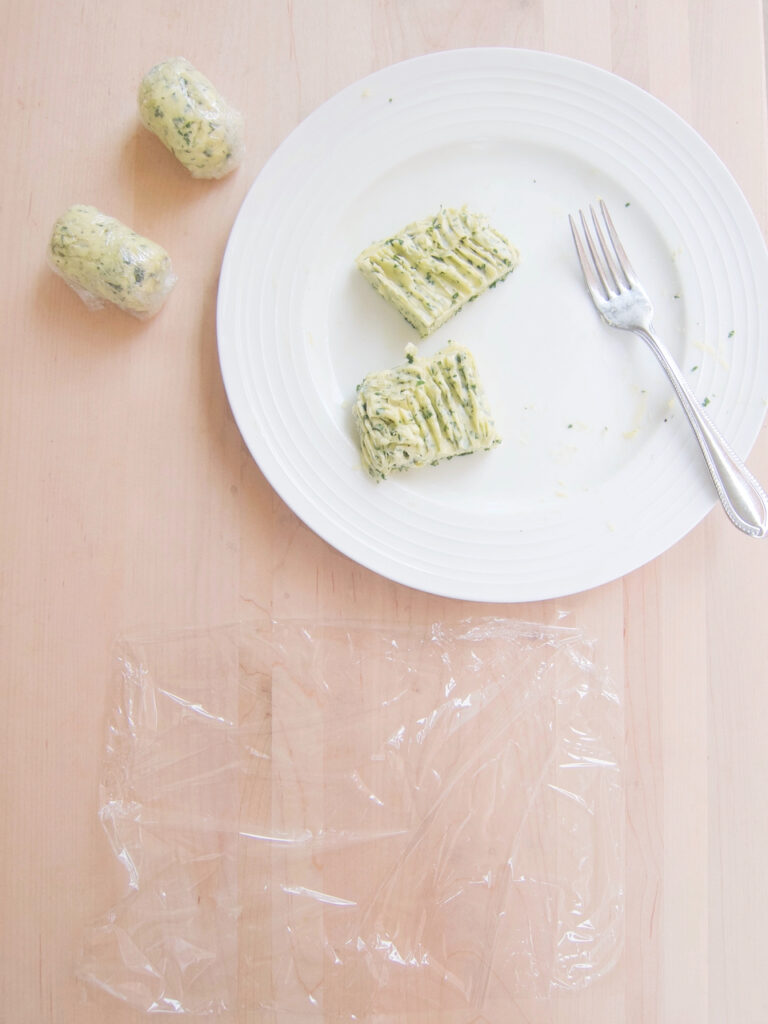
Make compound butter by letting the butter become soft, mixing the garlic mixture, pepper and herbs. Divide and forming the butter into 4 egg-shaped pieces and chill them in plastic wrap.
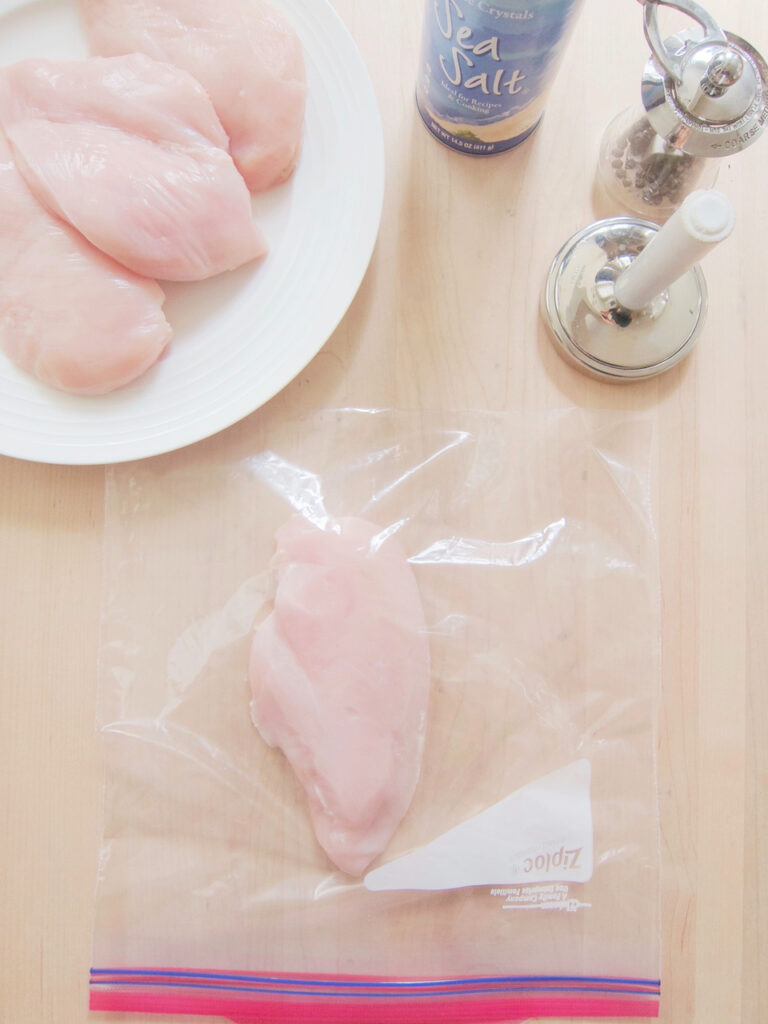
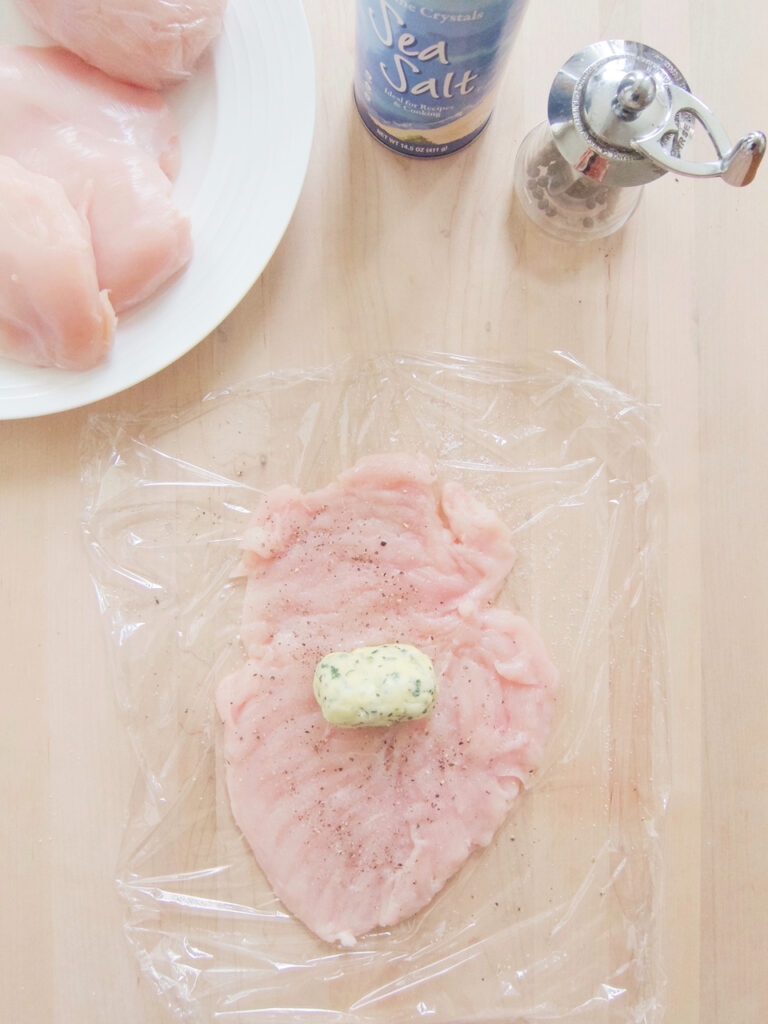
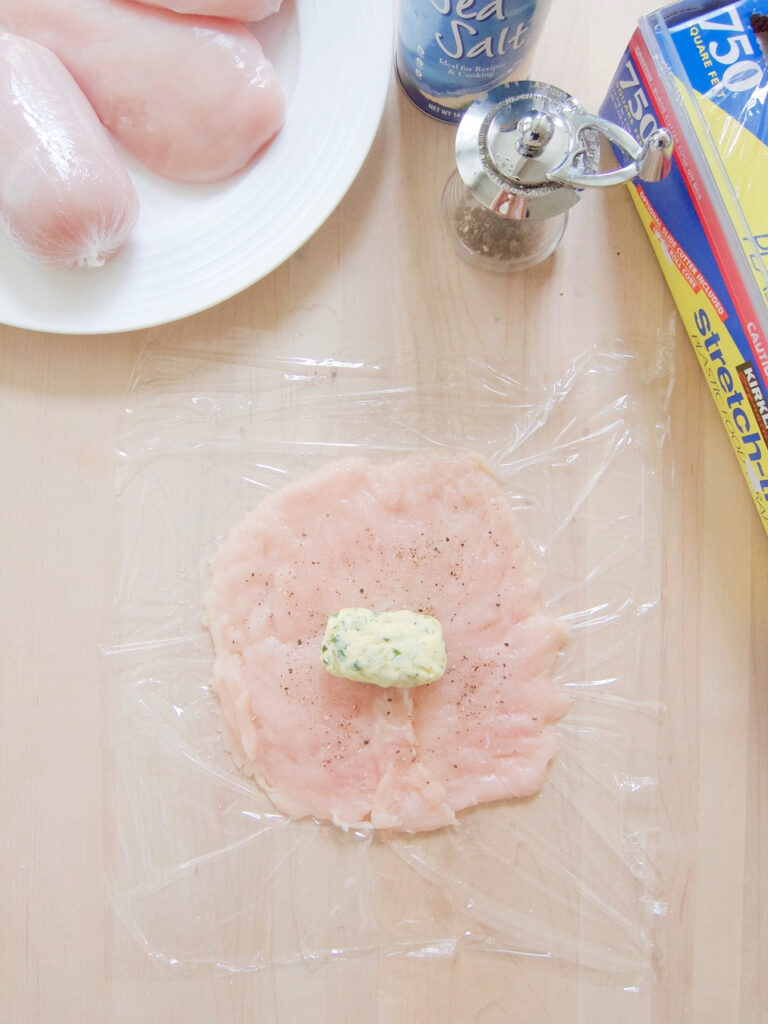
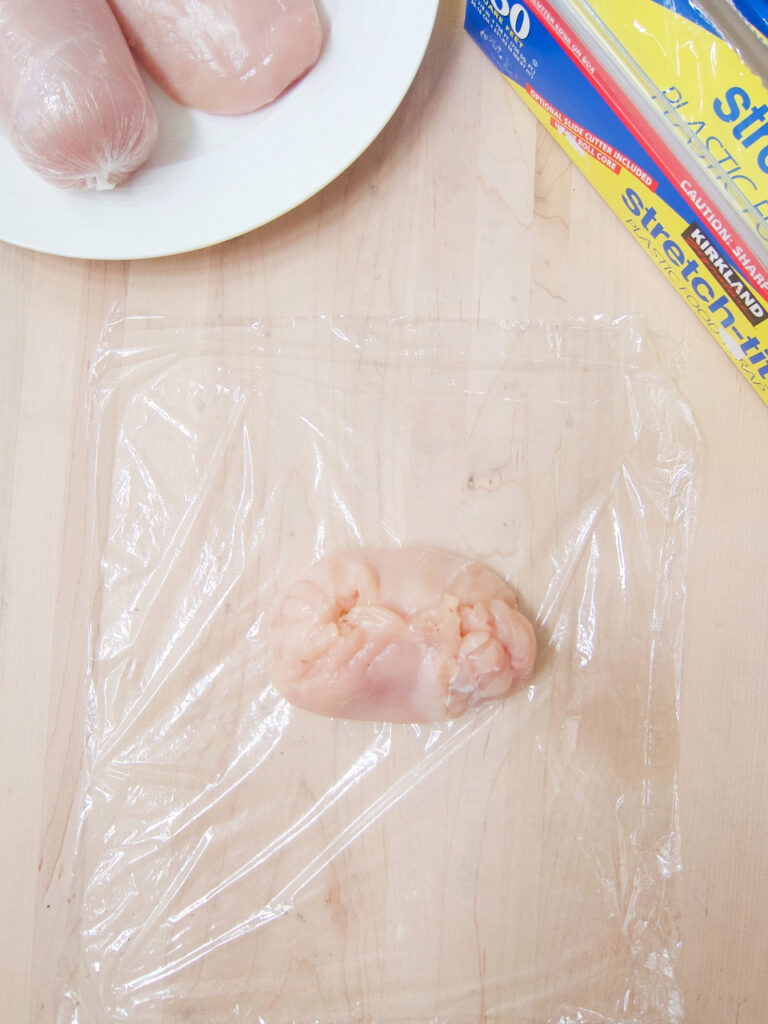
If your chicken breasts have the tenders still attached (This happens when you start with a whole chicken, not when you buy a package of breasts at the store.), remove them and save them for another recipe. Weight the breasts. If there is one that is larger than 8 pounds, run a sharp knife through the thicker part of the breast removing it until it’s the right weight. Then place the breasts in a large zip lock bag and pound them carefully to avoid making holes until they are about 1/4″ thick. A little thicker in the middle is okay but the outside needs to be as thin as you can get it without it completely falling apart. If you have areas in the center that are possibly too thin or there are holes, you can patch them using the stray pieces around the edges. Pound them very thin and set them over these places. Sprinkle the flatten breast with salt and pepper.
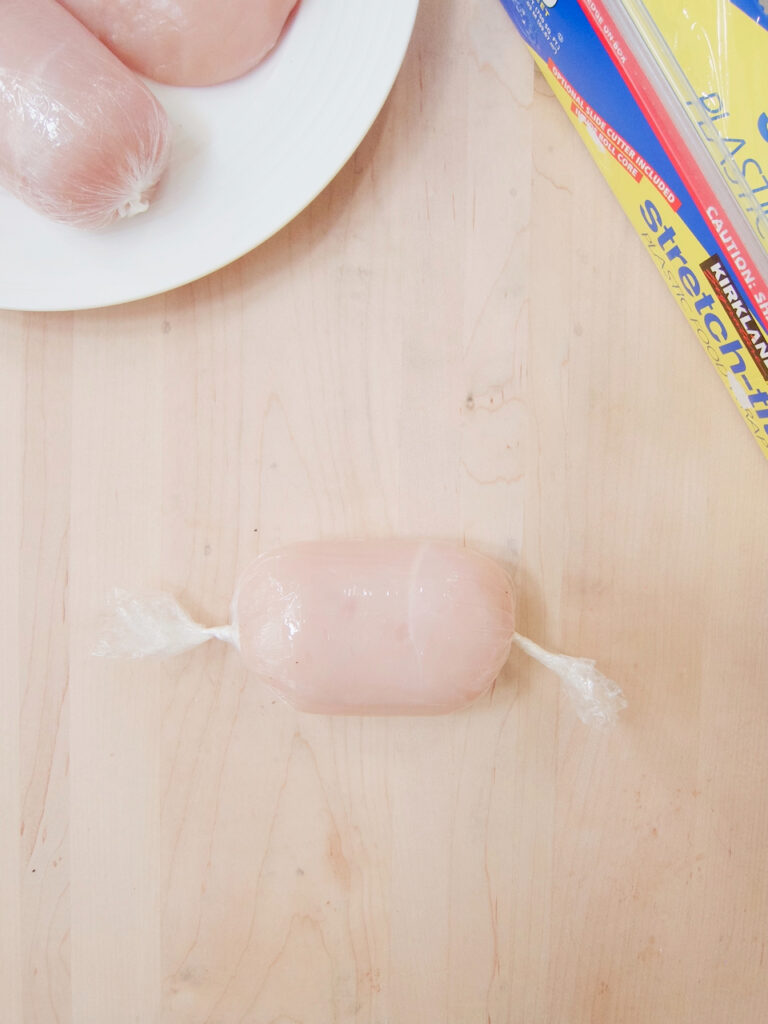
Place a piece of the compound butter in the middle of the biggest part and bring up the shorter sides over the ends of the butter, then lift one of the longer sides over the butter, then the other one over the first one, keeping everything tucked in. You can make them round or an oval shape. For the oval shape roll them up tightly in the plastic wrap and twist the two ends. For round follow Chef John’s video for one twist at the bottom. Freeze for 30 to 45 minutes depending on your freezer. It should be stiffer (not frozen hard) and all the flaps are holding in place*.
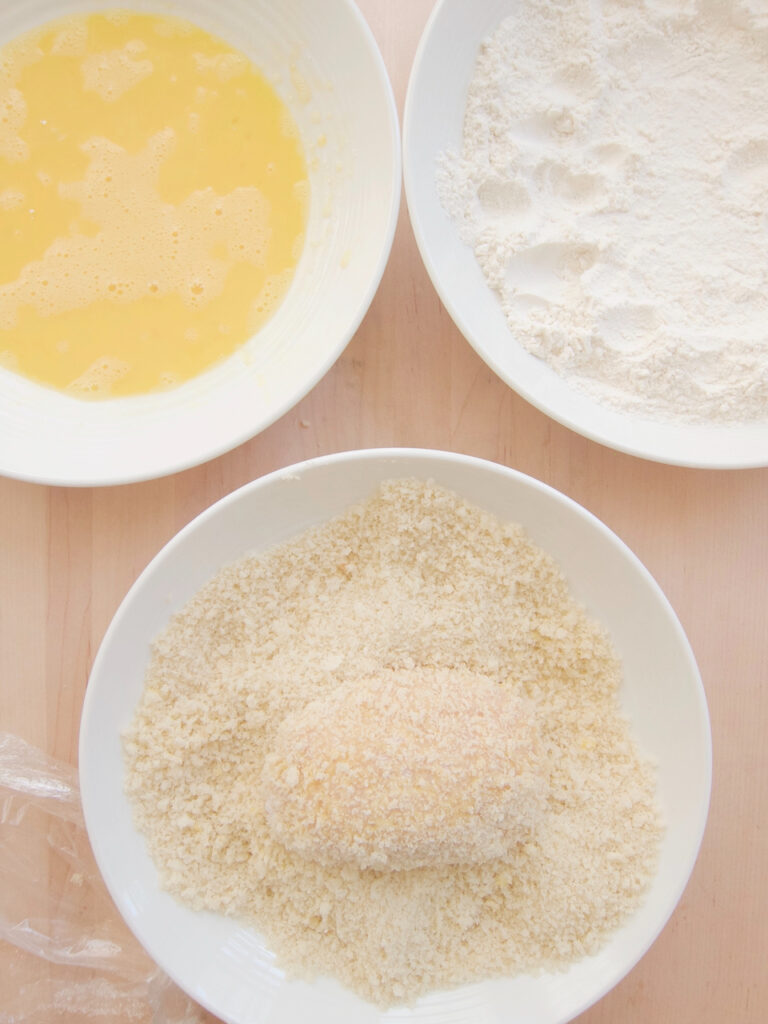
Line up three shallow wide bowls, one with the flour mixture, one with the eggs lightly beaten, and one with the bread crumbs. Dredge each piece first in the flour, then the egg mixture, then the bread crumbs. Put back into the freezer for 15 to 30 minutes*.
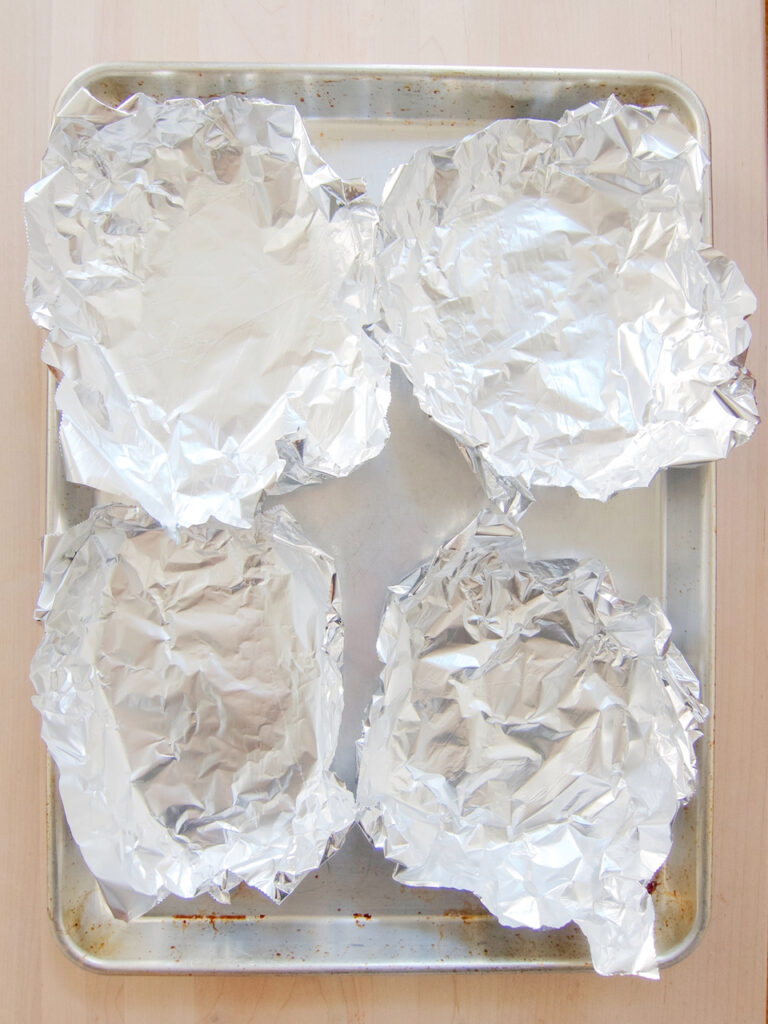
If butter leaks out, you can have a smokey mess because butter’s smoke point is 302°. And even if you rescue the butter from the pan, it will have an unpleasant smokey taste. To avoid this, I recommend making a foil ‘boat’ for each one using a 10″ by 10″ piece of foil. Set these on a baking sheet and set aside.
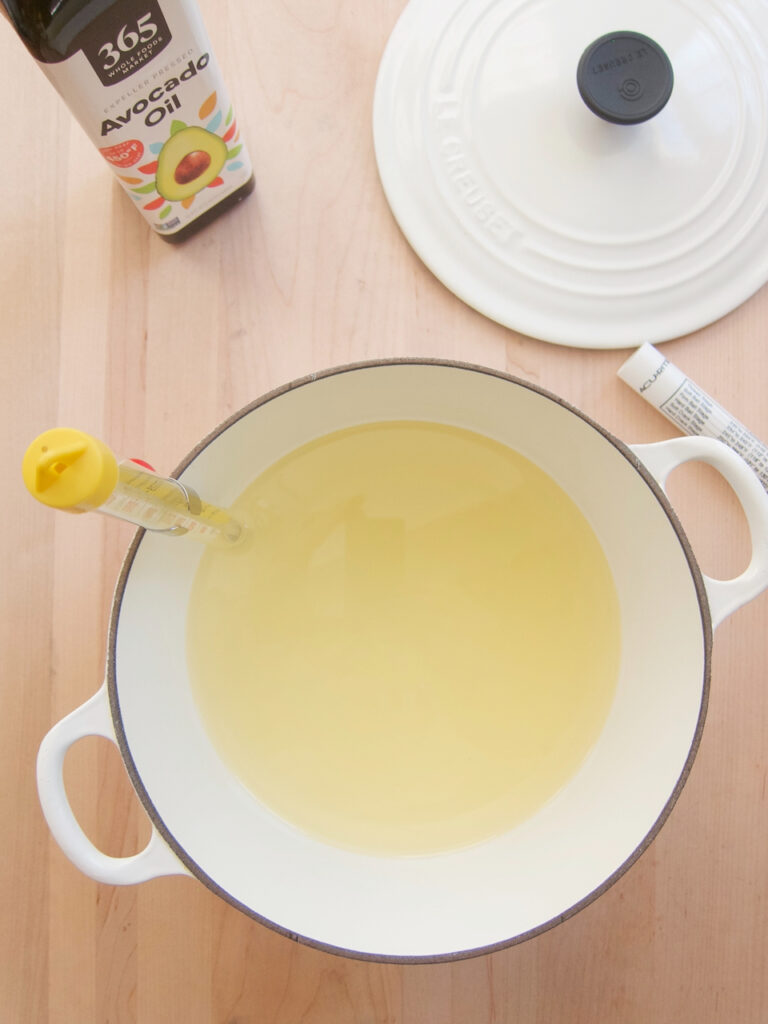
Because I use avocado oil which is expensive, I’m not using as much oil as Chef John, and also he is only doing 2 chicken Kiev in his video. The remaining instructions include how to handle 4 chicken Kiev.
Preheat the oven to 400°. Fill a cast iron pan or enamel covered cast iron pot or small dutch oven (Le Creuset) with 1 1/2″ to 2″ of oil and heat to 350°. Using tongs, place a rolled chicken piece in the hot oil with the flaps side down (the smooth side up). Let cook about 1 minute and 15 seconds and then turn it over and cook another 1 minute and 15 seconds, turning more golden as it cooks. If the temperature of the oil drops from the cold chicken, turn the heat up higher until it is maintaining 350°, not going over or under.
Bring the baking sheet over to where you are working. Take three of the foil boats and set them on the counter. When it’s done briefly drain the first chicken Kiev on paper towels, then place it in its foil boat and set it on the left in the back of the backing sheet and put it in the preheated oven. Then as each one is done, put them on their boat and then into the oven in clockwise order. I set four timers using Alexa that has a companion wall clock so you can see all the times at a glance. Bake them for 17 minutes each. Then as each one is done, set it in a warm place. On a baking sheet in a second oven set at 200° is ideal. As they rest, they will complete their cooking. Making sure the last one gets 5 to 7 minutes to rest.
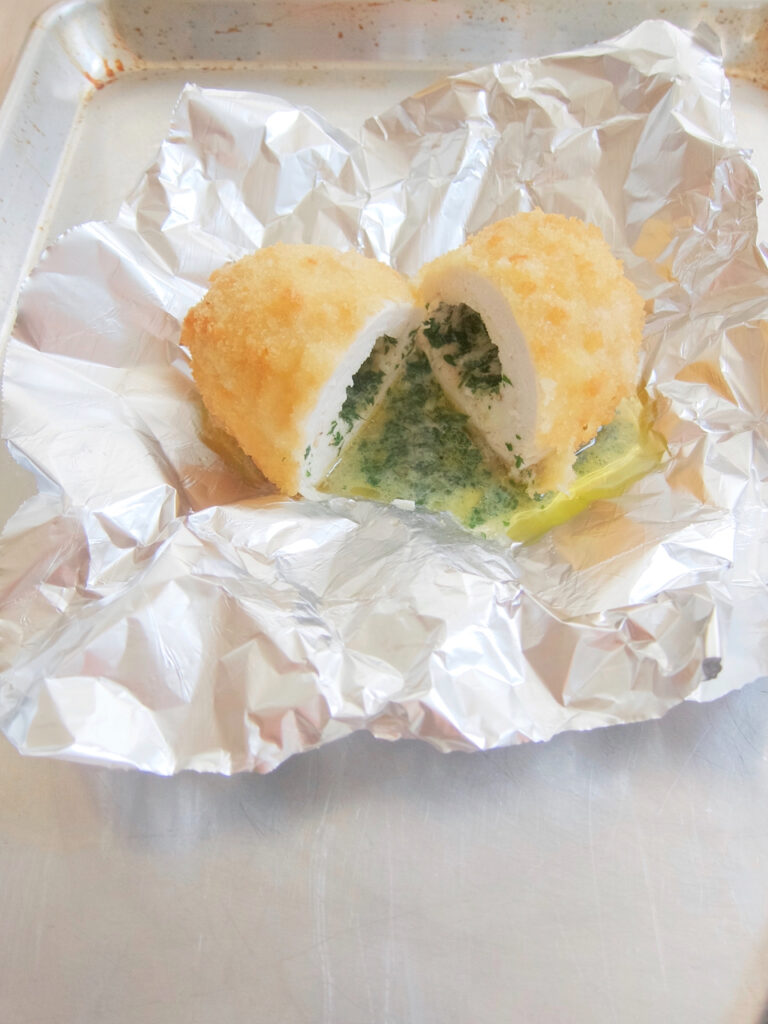
If you want to check the chicken with an instant-read thermometer, the temp needs to be 165°. If you have the chicken Kievs in the foil boats, if by checking the temp you release the butter, it will collect at the bottom under the chicken Kiev.
If a chicken Kiev has leaked during the baking process, it’s not a problem because the butter will have been caught in the foil boat and you can pour it on the rice, then set the chicken Kiev on top when you plate it.
*You can also refrigerate the chicken overnight at this point and using the freezer will not be necessary. Also after breading the chicken, it would go back in the refrigerator and you would take one out at a time to fry it.
For me each breast has pounded into a different shape.
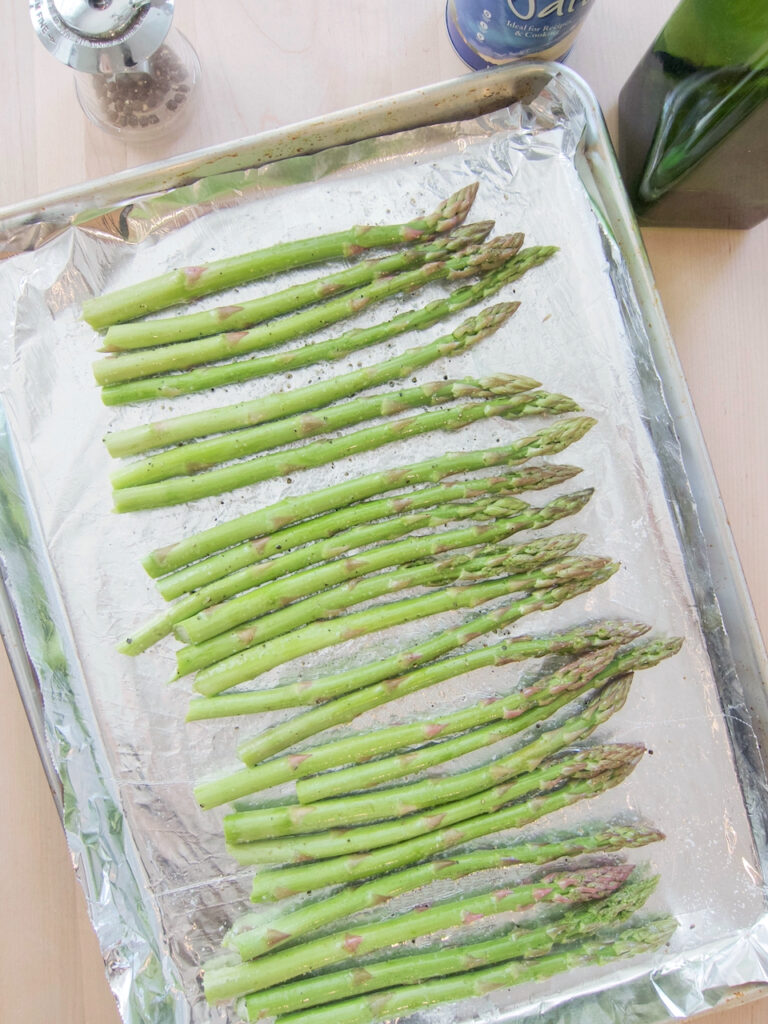
Perfectly Roasted Asparagus
- 1 bunch asparagus
- 1 1/2 tablespoons avocado oil
- 1/4 teaspoon salt
- 1/4 teaspoon pepper
Ingredients
Instructions
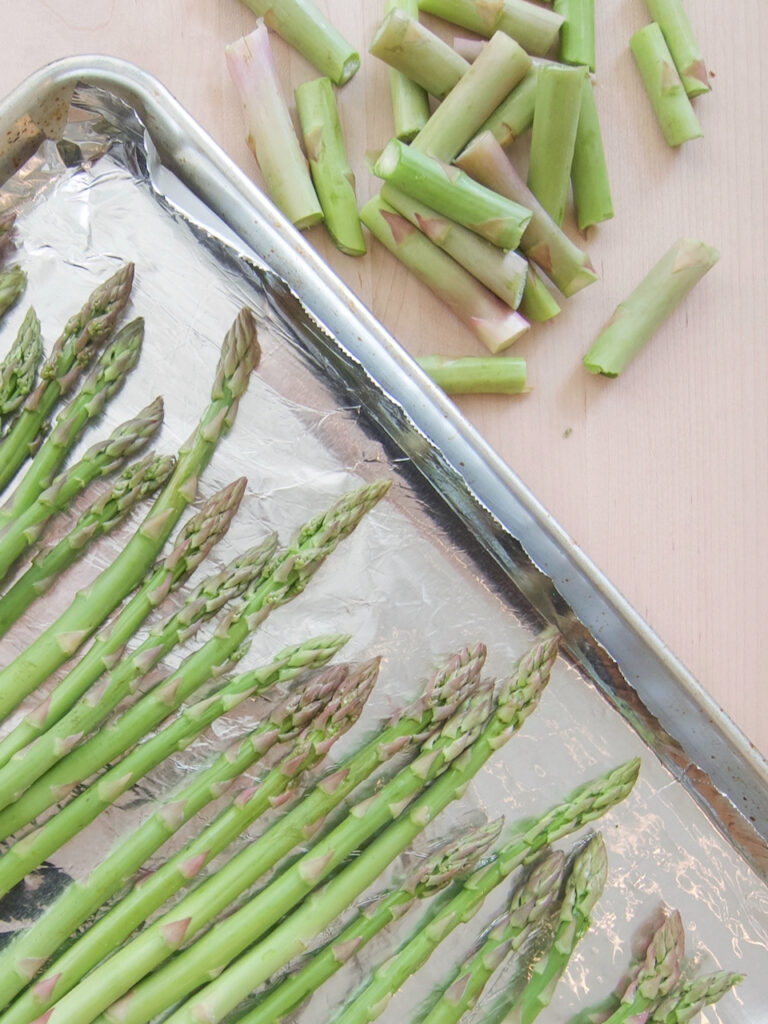
Preheat oven to 425°. Line a baking sheet with foil. Wash and dry the asparagus. Cut or snap off the bottoms of the asparagus. Line up the asparagus in the baking sheet. Drizzle with the oil and sprinkle with the salt and pepper. Using your fingers, rub the oil all over the asparagus.
Roast for 6 to 10 minutes for slender asparagus, 11 to 14 minutes for average asparagus, and 15 to 20 minutes for very thick asparagus. Perfectly roasted asparagus is bright green and crisp. Overly roasted asparagus is olive colored, floppy and the peel is tough and chewy.
“25 Unusual Monuments in Kyiv”.
“How to make Chicken Kiev like a real Ukrainian” with the chicken wing bone attached.